My woodworking and leather projects. I hope you find useful information here.
No. 3 Stanley Rehab
Last week, Josh Clark put out his latest tools for sale list and there was a pretty sad lookin’ No. 3 Stanley up for sale. I’d been lookin’ for a smaller plane and have been having a lot of fun rehabing planes. In typical Josh fashion this “good user” showed up and was indeed a good user.
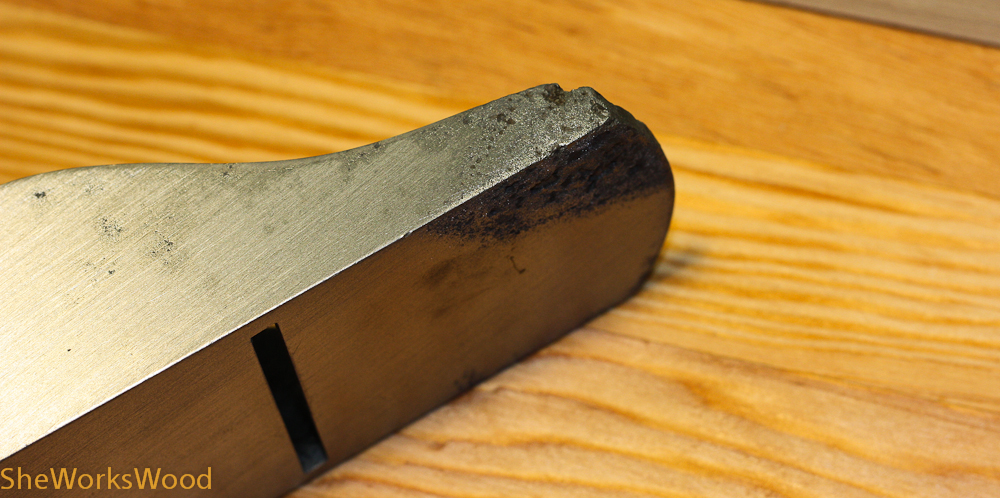
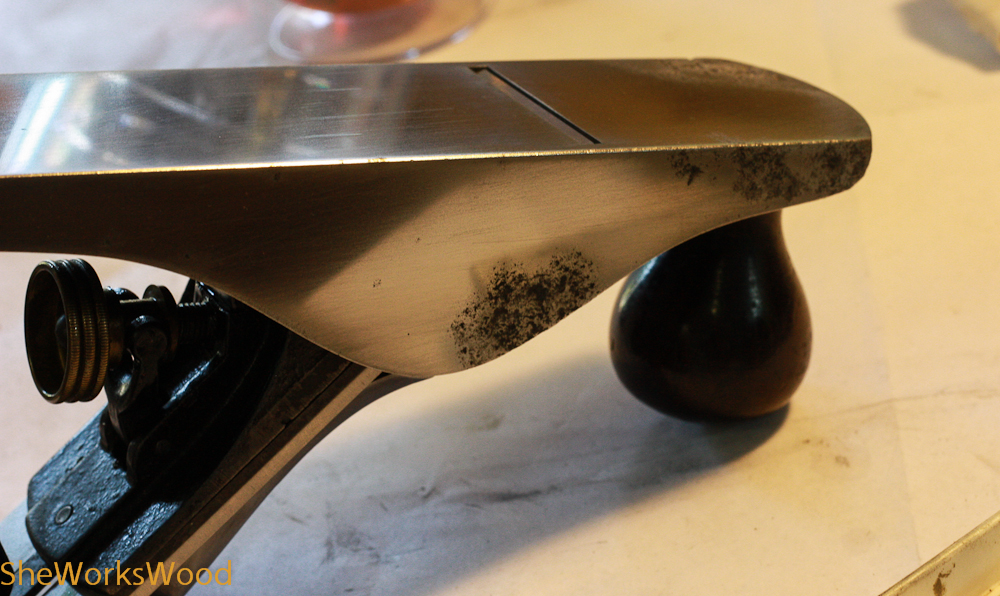
This plane has some significant pitting at the toe and in a couple of places along the side. But I just need a good user since I’m not a collector.
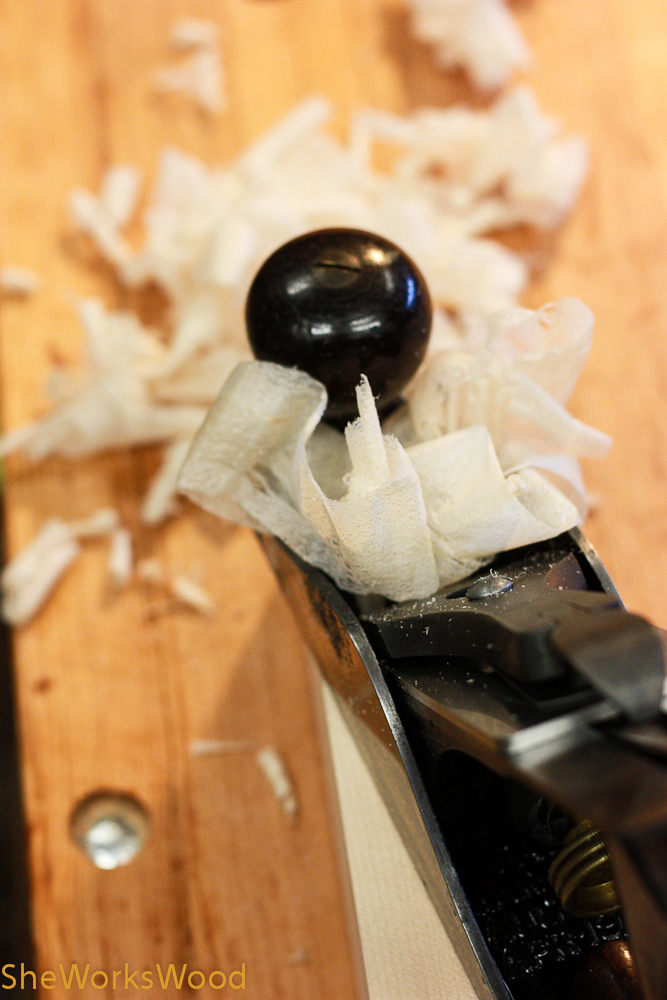
After
Here’s the gallery:
Another before shot.
Before
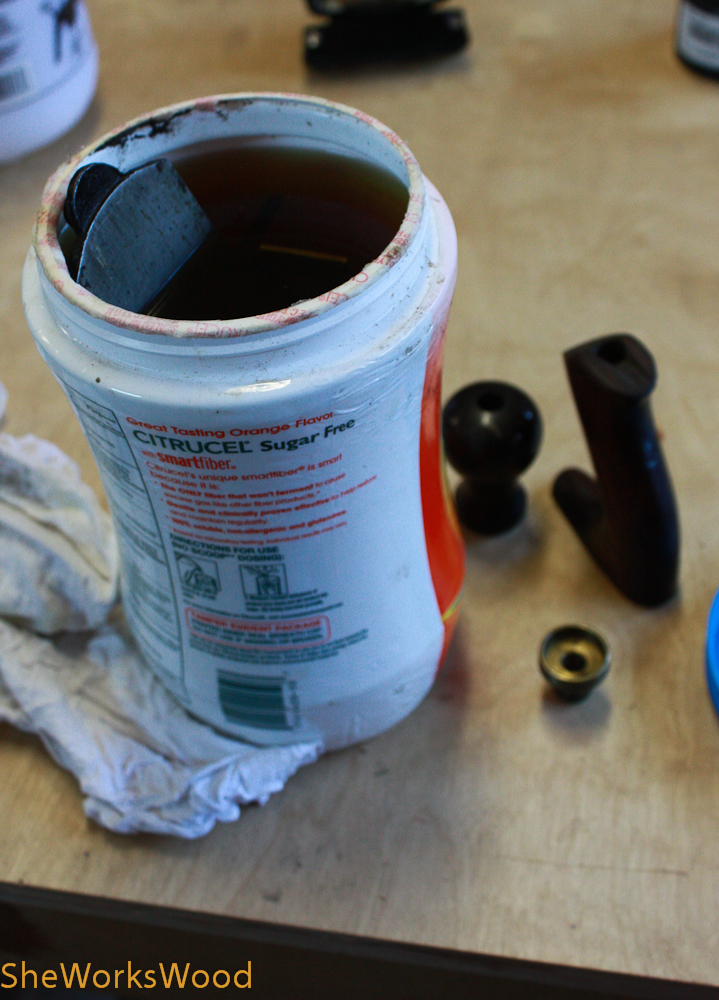
First I took the plane completely apart, removed the wooden handles and put all the metal parts into EvapoRust.
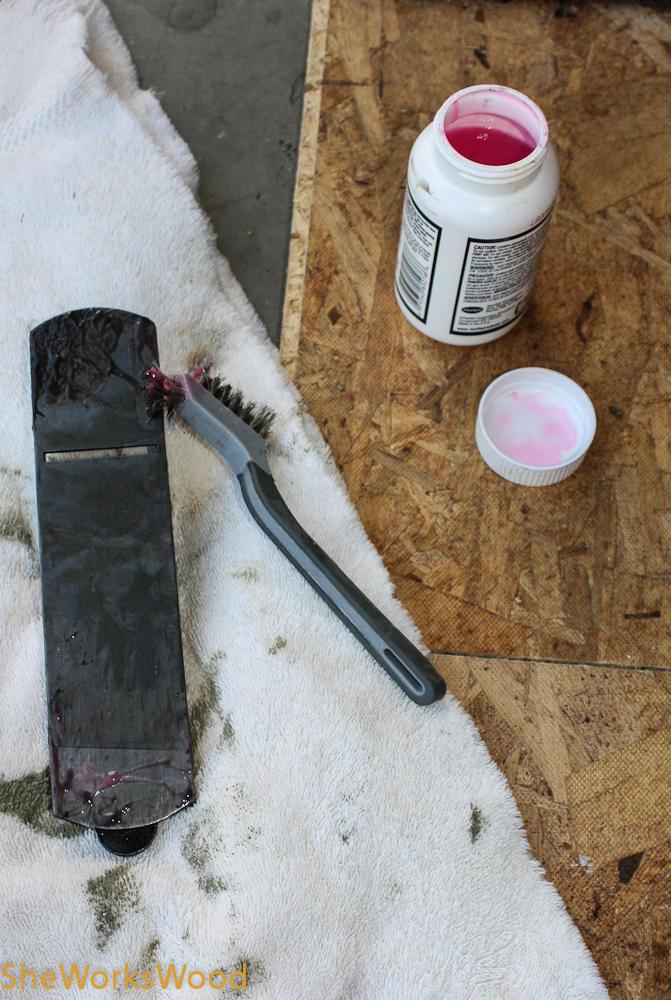
Then I cleaned the pitted areas with navel jelly. The goal is to remove as much rust as possible to help prevent further deterioration.
This is how the major parts looked after cleaning. Again the goal is not to remove the deep pitting but clean in hopes of preventing more rusting.
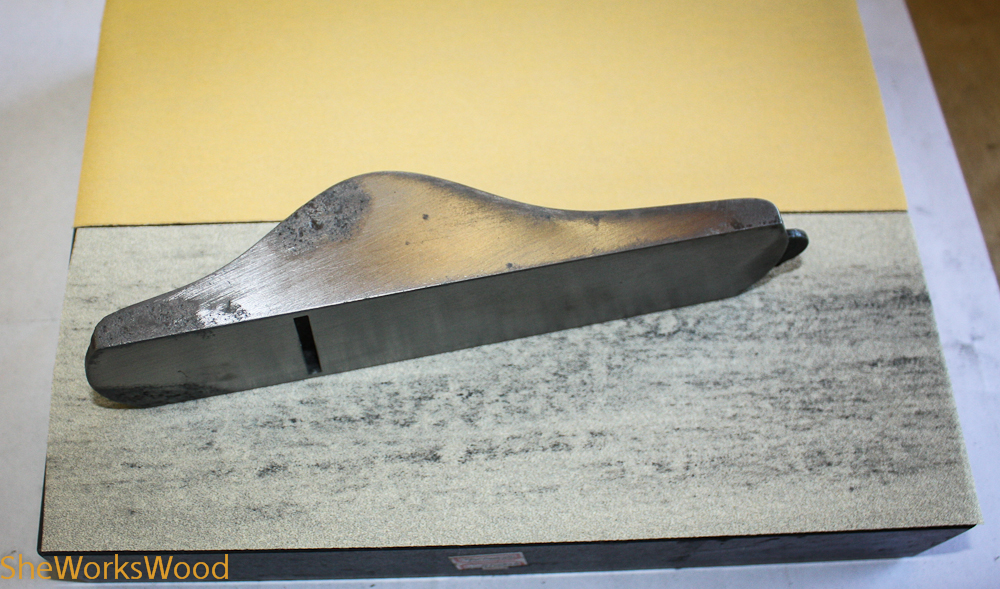
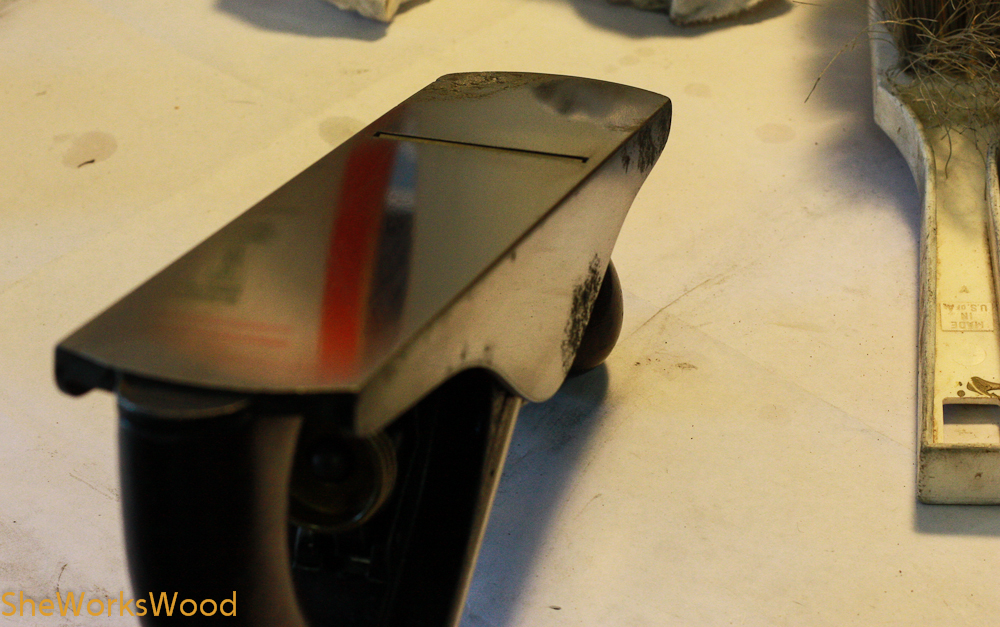
Then I lapped the bottom and sides on 100, 180, 220, 320, 400 and 600 grit paper cleaning more rust off.
After cleaning and lapping the toe still looks pretty rough.
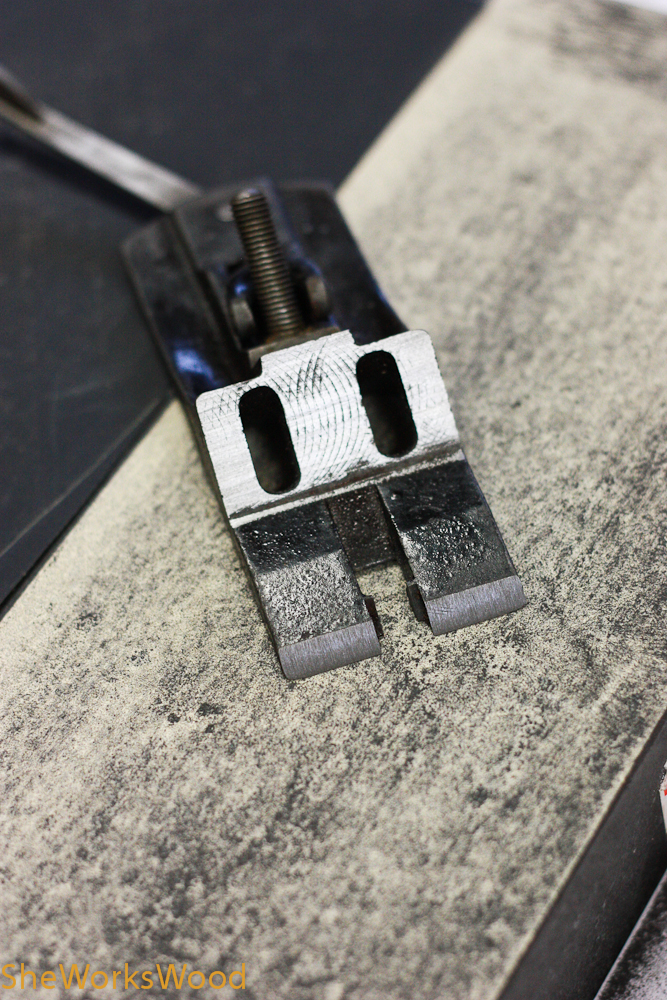
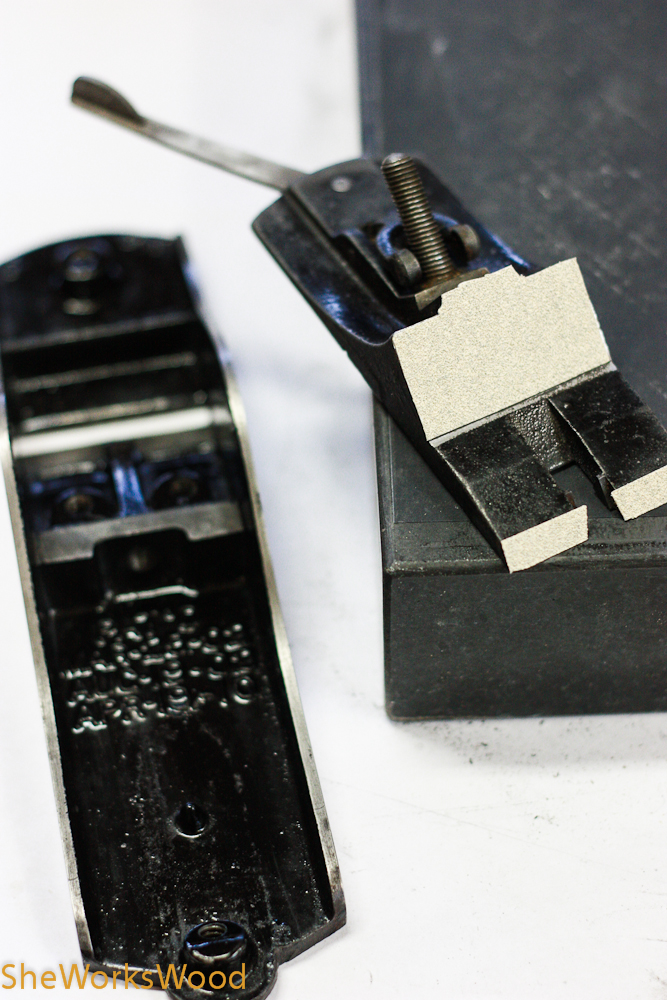
Then I flattened the surfaces of the frog to ensure good contact with the blade and the plane body.
Normally, the next step is to stick sand paper to the frog and clean up the plane body contact surfaces, but this plane was so tight I wasn’t able to do it.
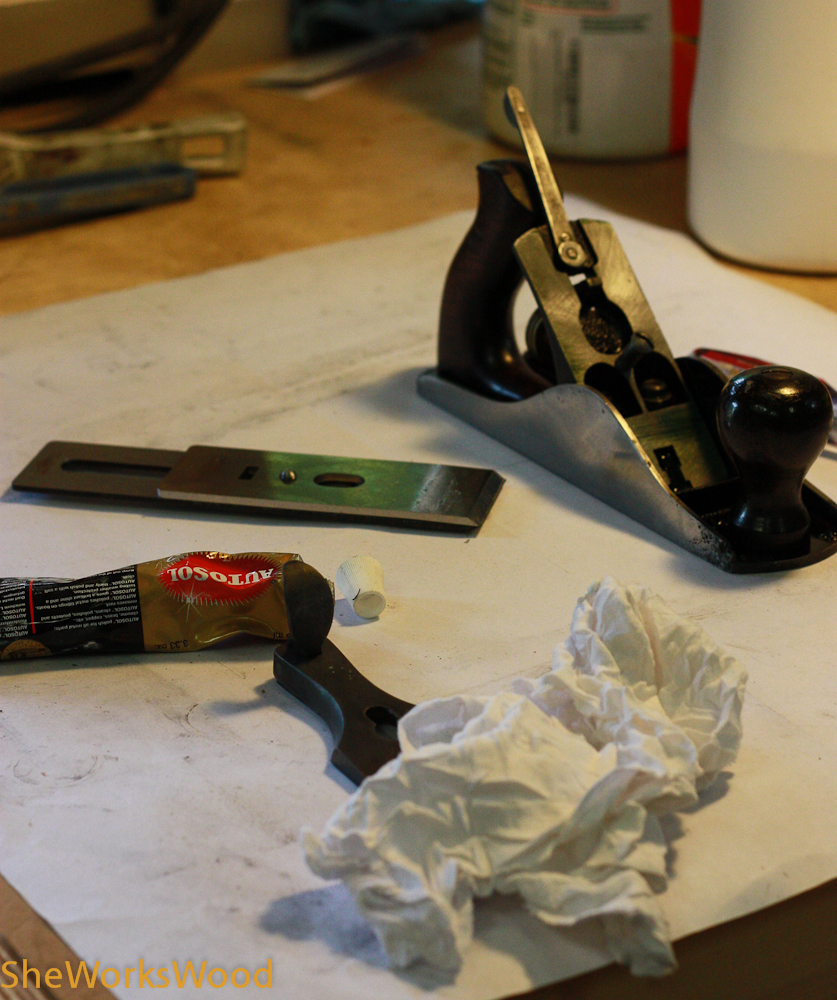
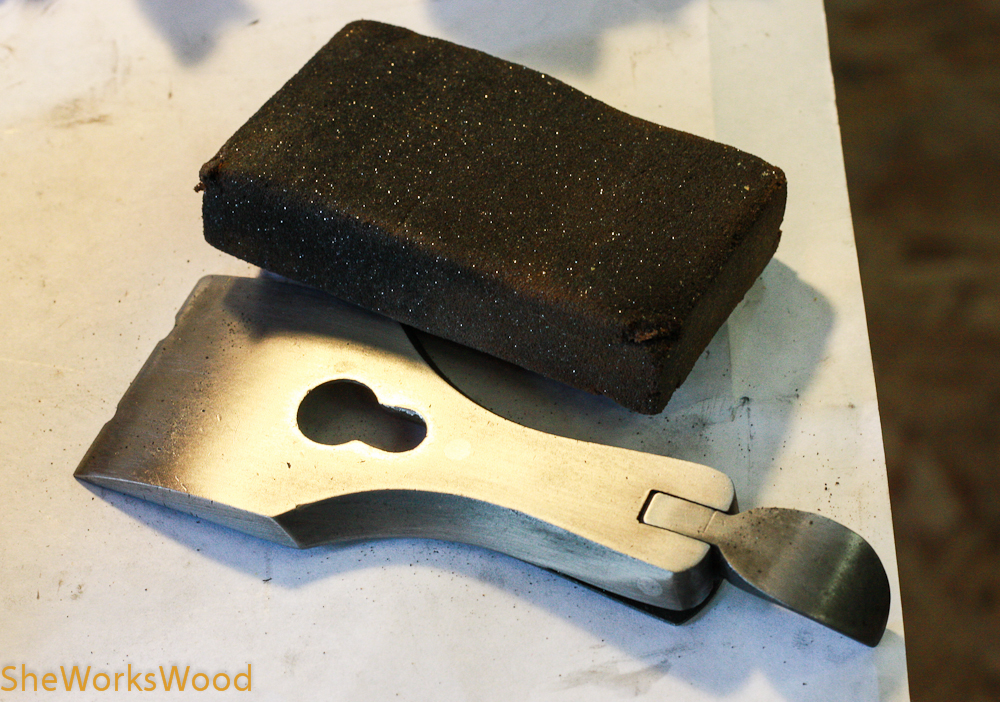
Then I used metal polish to clean the surfaces further and leave a protective coating.
More polishing on the lever cap.
Polishing to prevent rust and create a good working surface in spite of some pitting.
Nice work Marilyn. That will be a great user. The pitting won’t have any effect on the usefulness of the plane, but be sure to keep the pits well coated with paste wax or they will keep rusting.
Here’s another good suggestion: “Oh, and don’t think of the pits as defects- they are wax holders. Fill the pits in the sole with candle wax and it’ll keep the plane sole lubricated and running smooth for hours ;)” Josh
You _could_ repair the pits. The easy way would be to use Lab Metal (http://www.alvinproducts.com/). It would be primarily a cosmetic repair, anything on the sole would probably wear away pretty quickly.
Plan B would be to have the pitted areas build up with cast iron welding rod. That would be nearly invisible and every bit as durable as the original casting.
Anything can be repaired, at a price. We often need an inexpensive user tool, and vintage tools can be a good choice to that end. However, one must know when to stop or the cost can quickly get out of hand. Welding those pits could cause serious distortion in that old gray iron casting. May I recommend leaving them as is. The
pits tell a story of neglect and your quality restoration tells one of caring.
“The pits tell a story of neglect and your quality restoration tells one of caring.” Ah! Well said. I like it! I was leaning that way and now I can do that without regret. Thanks!
Beautiful restoration! I consistently fight rust here in Maryland too, and I have found that a couple coats of T-9 Boeshield followed by a coat of wax does wonders on all my tools with exposed metal faces (even the ones with lots of pitting). I have also, like you, discovered the wonders of Evaporust, hooray for modern chemistry!
Thanks for checking it out! I have added you to my blogroll as well. Keep up the good work!
I have a 100+ year old #7 that I came across in very good shape. I got a nice edge on the iron and the sole was very good to begin with. I’m having a little trouble with the blade adjustment. Any suggestions would be more than welcome. Before I forget the plane looks pretty awesome.
I will have to mess with the frog a bit. I think I will give it a really really good cleaning too. I don’t enjoy rehabbing tools to be honest. But this plane was in such nice shape that I figured I would give it a shot, in particular the flat sole. It’s just not adjusting smoothly at all. I’m going to flatten the frog, and soak the adjustment mechanism in some machine oil and go from there.
Sounds like a good plan! If you get it to work, bet you’ll get a lot a satisfaction using it.
I’ve restored a few planes and I try to make them look like they came out of the tool box of a mechanic who used and cared for his tools. Shiney, showroom new isn’t really approriate. On rusted surfaces, I use a solid rubber block with grit embedded, Sandflex is the name from Woodcraft (and others) ( http://www.woodcraft.com/family.aspx?familyid=7329 ). I can control just how much “patina” I want to see. It doesn’t leave black mess like sandpaper. You can look up electrolysis, but it is messy process, and leaves you with a gray steel. It does cut the red rust, not the black pitting. To work properly, the mating surfaces on the frog and body need to be resonably smooth. The top of the frog needs to be reasonably smooth so that the cutter blade will slide smoothly when adjusted. Once you’ve done that, any further smoothing is for aesthetics. So, to answer your question, the scotchbrite won’t hurt anything, but be sure that you will be happy with the appearance of the surface it leaves. After cutting down to fresh steel, I would definately protect the metal with paste wax. I use Johnson’s. And, if the black paint “japanning” on the inside of the body is a bit rough, you can make it look a bit better by waxing the first coat with liquid black shoe polish. Do clean up the wood handles too, when that rosewood is finished and shining–looks great. Wax helps them too. To use the plane, the blade must be razor sharp at the proper angle. Again you can find help on this courtesy of Google.
")
") This plane has some significant pitting at the toe and in a couple of places along the side. But I just need a good user since I’m not a collector.
This plane has some significant pitting at the toe and in a couple of places along the side. But I just need a good user since I’m not a collector.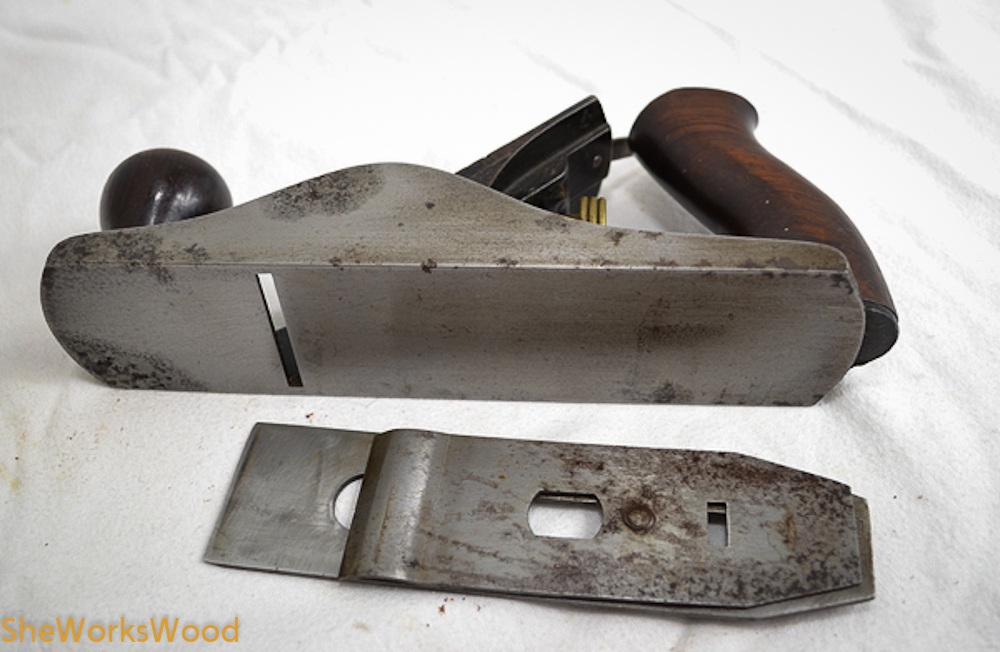


The #3 came out great Marilyn! I know every time I use a plane that I had to restore I always feel really good about the tool.
Thanks! I’m looking forward to putting it to good use.
Yeah!I agree. Its really fun to use something that someone used long ago. And I’m always amazed at how comfortable these planes feel.
Nice work Marilyn. That will be a great user. The pitting won’t have any effect on the usefulness of the plane, but be sure to keep the pits well coated with paste wax or they will keep rusting.
Great advice! Thanks!
Your handle certainly make the restore a success!
Here’s another good suggestion: “Oh, and don’t think of the pits as defects- they are wax holders. Fill the pits in the sole with candle wax and it’ll keep the plane sole lubricated and running smooth for hours ;)” Josh
You _could_ repair the pits. The easy way would be to use Lab Metal (http://www.alvinproducts.com/). It would be primarily a cosmetic repair, anything on the sole would probably wear away pretty quickly.
Plan B would be to have the pitted areas build up with cast iron welding rod. That would be nearly invisible and every bit as durable as the original casting.
But filling them with wax is a good thought 🙂
Hmm .. decisions, decisions.
Anything can be repaired, at a price. We often need an inexpensive user tool, and vintage tools can be a good choice to that end. However, one must know when to stop or the cost can quickly get out of hand. Welding those pits could cause serious distortion in that old gray iron casting. May I recommend leaving them as is. The
pits tell a story of neglect and your quality restoration tells one of caring.
“The pits tell a story of neglect and your quality restoration tells one of caring.” Ah! Well said. I like it! I was leaning that way and now I can do that without regret. Thanks!
Beautiful restoration! I consistently fight rust here in Maryland too, and I have found that a couple coats of T-9 Boeshield followed by a coat of wax does wonders on all my tools with exposed metal faces (even the ones with lots of pitting). I have also, like you, discovered the wonders of Evaporust, hooray for modern chemistry!
Thanks! And Yes! I use Boeshield and was on my cast iron table (bandsaw etc.) and love it.
I added your site to my blog roll. Great site with a lot or great info! Thanks for reading and commenting so I could find it.
Thanks for checking it out! I have added you to my blogroll as well. Keep up the good work!
I have a 100+ year old #7 that I came across in very good shape. I got a nice edge on the iron and the sole was very good to begin with. I’m having a little trouble with the blade adjustment. Any suggestions would be more than welcome. Before I forget the plane looks pretty awesome.
I also just re-worked a number 7 and had some similar problems. https://sheworkswood.com/2012/09/01/workin-a-bit-more-on-the-corrugated-jointer/
Are you having troubles getting it square in the mouth? Or perhaps flopping around from side to side? or maybe getting the frog set in the right spot?
I will have to mess with the frog a bit. I think I will give it a really really good cleaning too. I don’t enjoy rehabbing tools to be honest. But this plane was in such nice shape that I figured I would give it a shot, in particular the flat sole. It’s just not adjusting smoothly at all. I’m going to flatten the frog, and soak the adjustment mechanism in some machine oil and go from there.
Sounds like a good plan! If you get it to work, bet you’ll get a lot a satisfaction using it.
I’ve restored a few planes and I try to make them look like they came out of the tool box of a mechanic who used and cared for his tools. Shiney, showroom new isn’t really approriate. On rusted surfaces, I use a solid rubber block with grit embedded, Sandflex is the name from Woodcraft (and others) ( http://www.woodcraft.com/family.aspx?familyid=7329 ). I can control just how much “patina” I want to see. It doesn’t leave black mess like sandpaper. You can look up electrolysis, but it is messy process, and leaves you with a gray steel. It does cut the red rust, not the black pitting. To work properly, the mating surfaces on the frog and body need to be resonably smooth. The top of the frog needs to be reasonably smooth so that the cutter blade will slide smoothly when adjusted. Once you’ve done that, any further smoothing is for aesthetics. So, to answer your question, the scotchbrite won’t hurt anything, but be sure that you will be happy with the appearance of the surface it leaves. After cutting down to fresh steel, I would definately protect the metal with paste wax. I use Johnson’s. And, if the black paint “japanning” on the inside of the body is a bit rough, you can make it look a bit better by waxing the first coat with liquid black shoe polish. Do clean up the wood handles too, when that rosewood is finished and shining–looks great. Wax helps them too. To use the plane, the blade must be razor sharp at the proper angle. Again you can find help on this courtesy of Google.