My woodworking and leather projects. I hope you find useful information here.
Making a picture frame with hand planes
I poked around the internet to find information on how to make a picture frame with hand tools. So except for some information that Shannon Roger provided in hisHand Tool School, I wasn’t really able to find anything. Everyone seems to be making frame with powered routers. Que post.
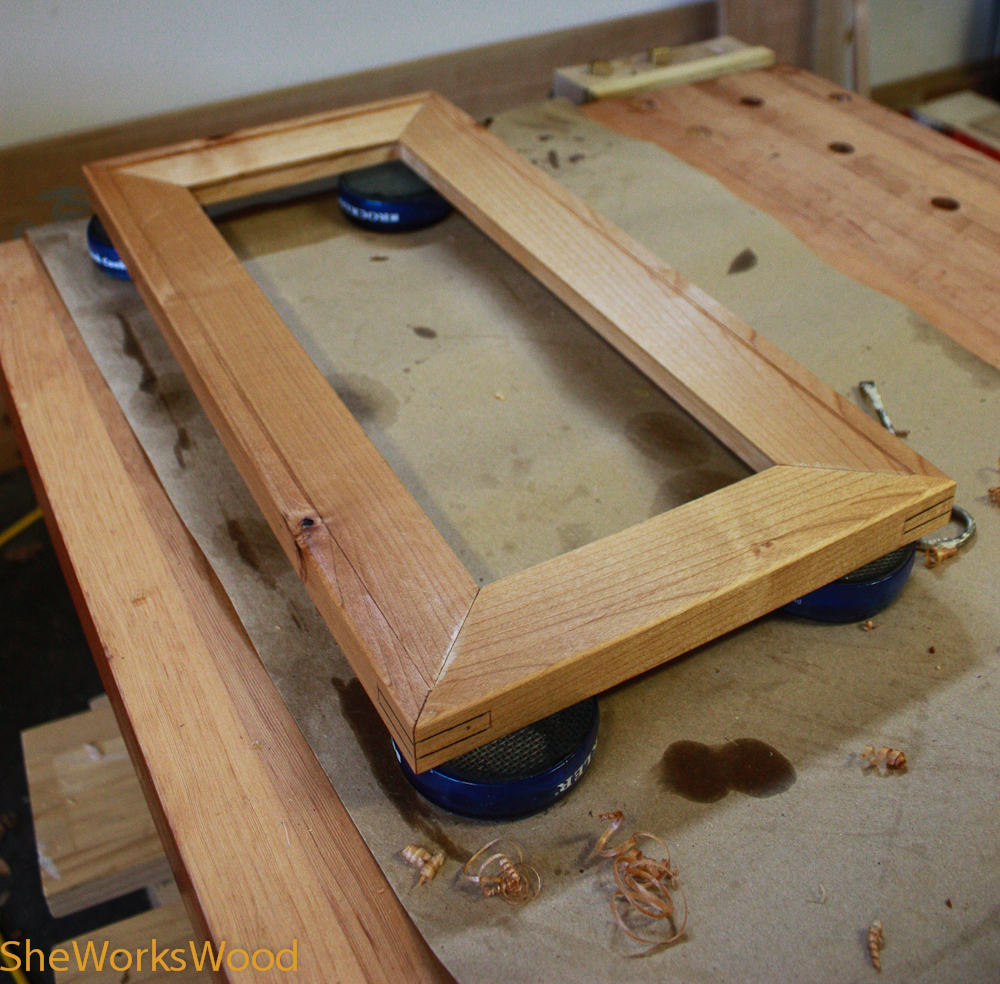
Here’s the final product with Boiled Linseed Oil finish.
I used my newly sharpened mitre box saw to cut mitres (thanksMatt Cianci) and my excellent picture frame shooting board (thanks Rob Hanson) for this frame. More pictures below the fold.
I bough the alder off of craig’s list from a remodel project. It’s really beautiful wood and very easy to work.
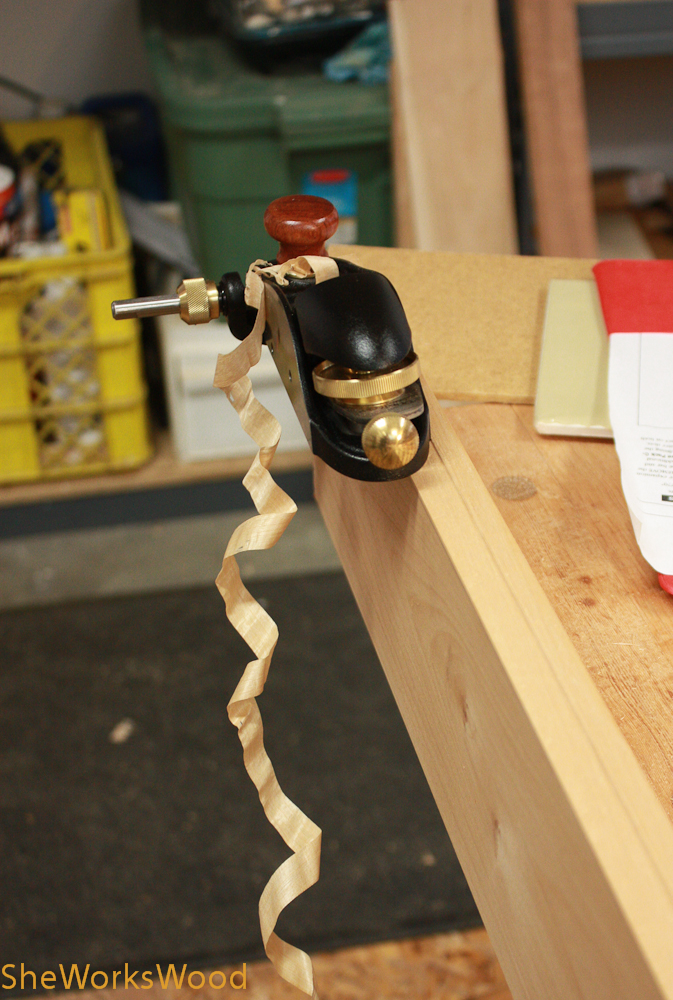
Used my rabbeting block plane to create a rabbet on the back side of the frame. The rabbet is deep enough to hold the picture, a hard board backer and a thin pane of glass. Disclaimer, I bought this plane before I got Chris Schwarz tool list but it works pretty nicely (no depth stop though).
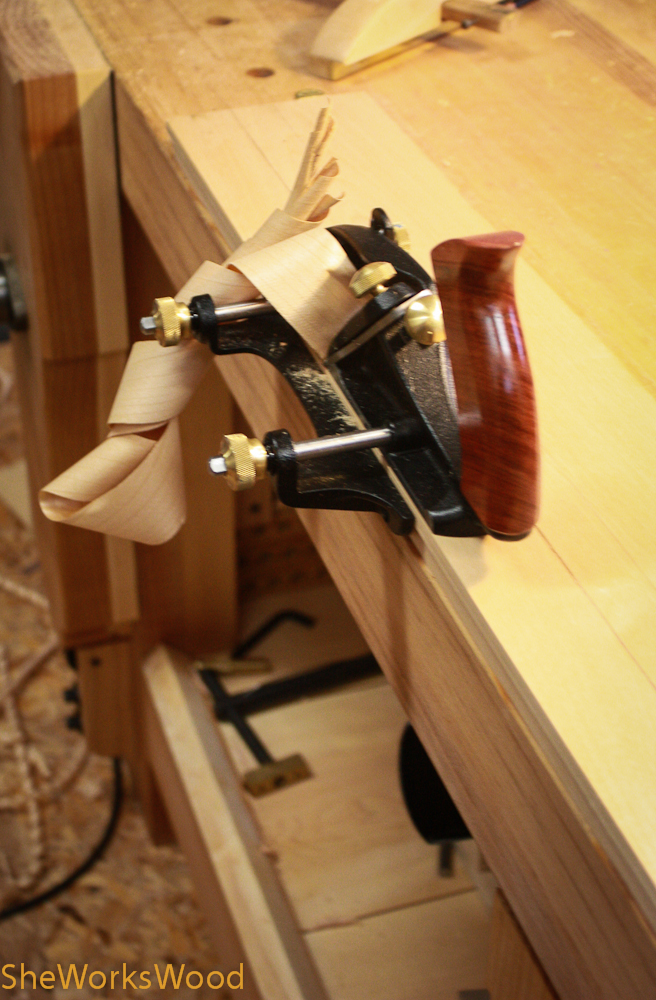
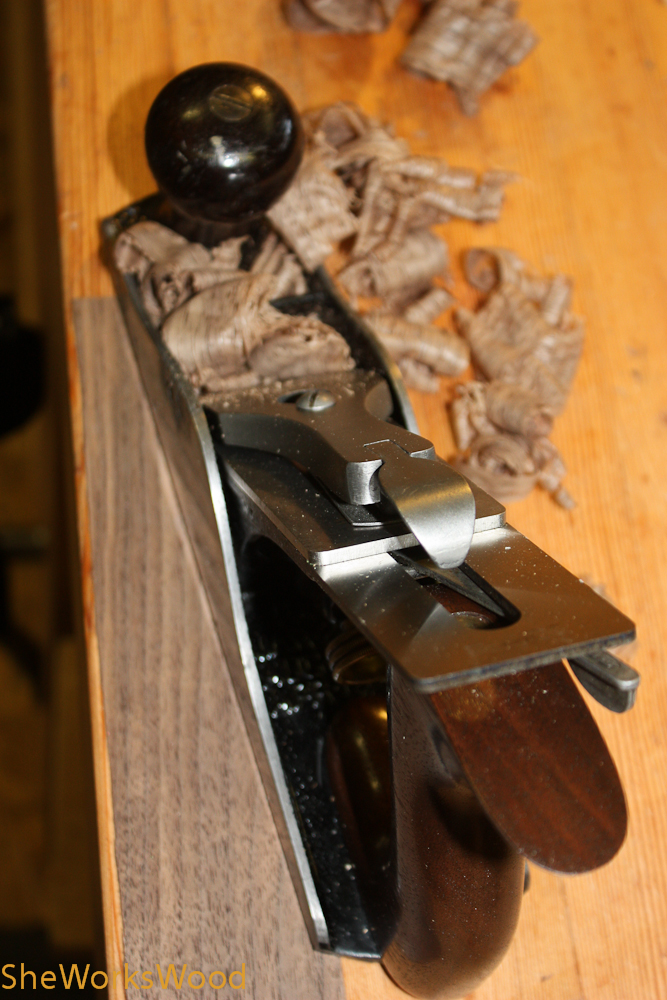
Then I used my moving filister to start the rabbet on the front side of the frame. The shaving I took here is way too thick.
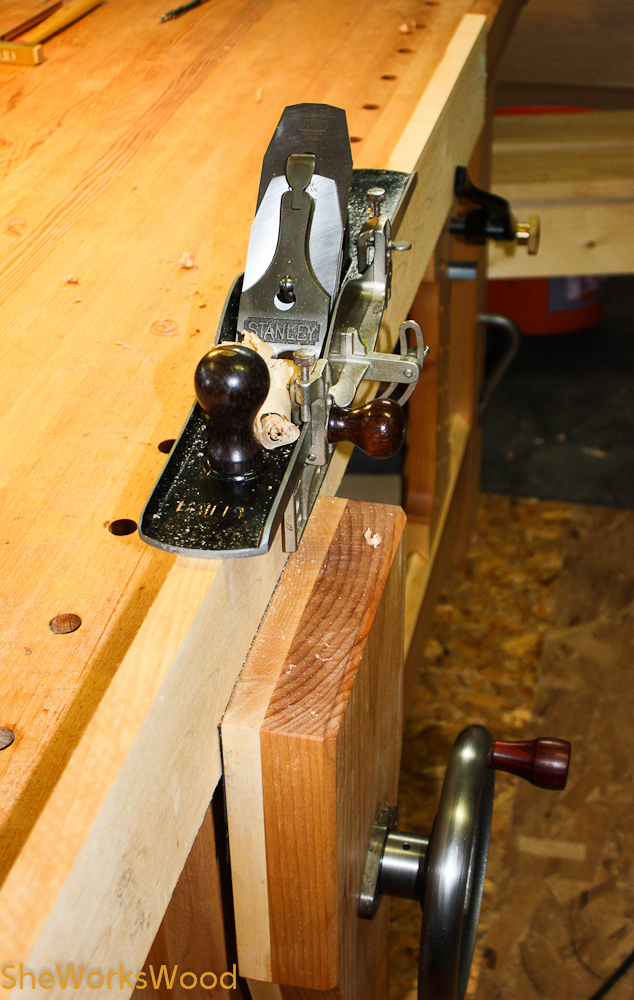
Used my jack plane to create a bevel that angles down toward the picture. I set the angle of the bevel by penciling in the depth and the width and planed to both.
I used my newly sharpened mitre box saw to cut the mitres.
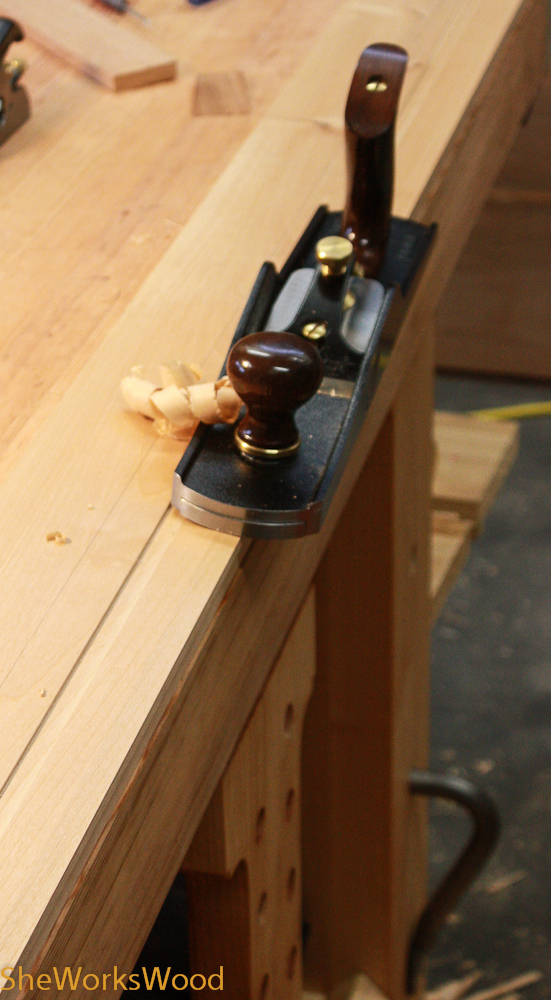
I used my newly refurbed No. 3 to thin out splines for to strengthen the joints.
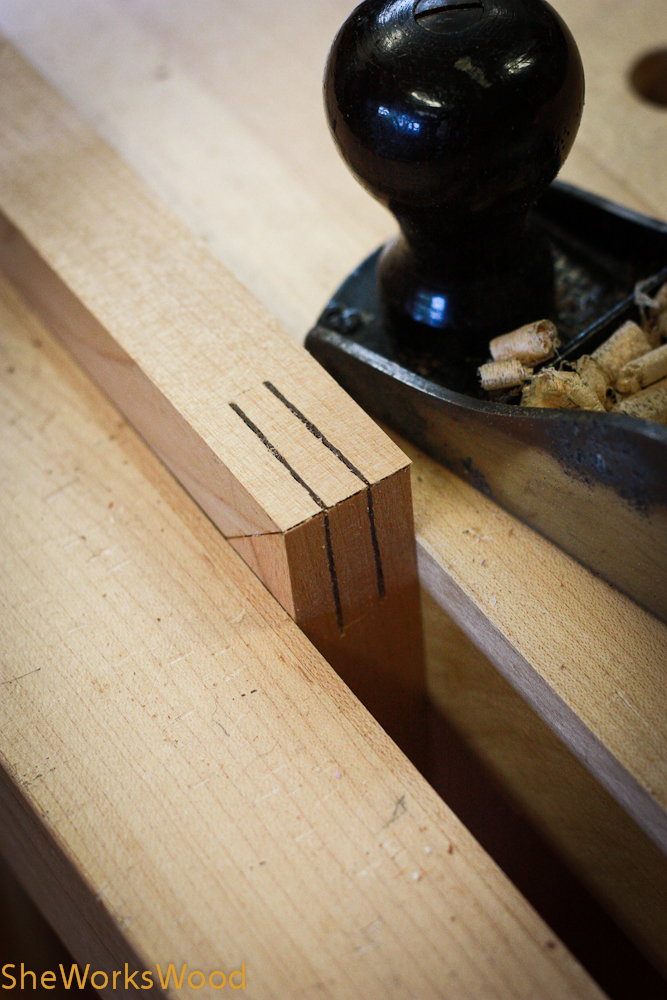
Here are the splines inserted into the saw kerfs. The kerf I cut with my tenon saw.
Using the No. 3 to clean up the glue and splines and the edges of the frame.
I have about 4 frame projects on the list. One of them started and scrapped! Like you said, I could use a smaller sized project in my little shop. Thanks for the inspiration.
Marilyn, if Matt Bickford ever makes out your way, the project in his 2 day molding planes class is a picture frame, my class report for that project: http://joecrafted.wordpress.com/2012/07/08/day-2-molding-planes/. I didn’t detail everything on my blog, but I do plan to make a few more for Christmas presents, maybe I can put together a more detailed posting, including cutting the rabbet for the frame, which normally would be the first thing to do when making them w/hollows and rounds.
Matt is going to be at the Port Townsend School of Woodworking next year. I’d be signed up already, but registration is available yet. :o) I have his book too. I plan to do a lot more of this and am grateful for your site (I’d actually seen it on my reader and forgotten about it). I plan on additional posts as well. It a fun small project and the step by step should be too hard to describe.
Don’t know if you saw the before picture (under the mitre project tab), but it was covered in dirt and I had no idea. what was under it. I was doing a light sanding and wondering what the marks were that were persisting so I rubbed some mineral spirits on it and, as Gomer used to say .. surprise, surprise!
Matt said that was highly unusual to find such a thing (Yeah, I talked to your saw doctor about your saw. No HIPA stopping me here!) and that he remembered your restore well.
I’ll have to go look at my old Disston miter saw tonight and see if it is covered in grime, too. 🙂
LOL! Happy finding!
Greetings! Very helρful writting about picture framing . It is the little changes that ρroduce tɦe largest ϲhanges.
Many tɦanks for ѕharing!
Thanks so much for this, I’ve been looking around for a good demo with pictures of steps do do this project for ages. As a woman that dabbles with wood work I have to say, It’s great to see another posting up good work!
Those I’d been referring to previously were clearly not using their tools correctly and generally winging it quite a bit to be honest. So thanks. This was really helpful. Very happy to find this post!
")


The miters look very tight. I always struggle with miters. Great job!
Thanks! Between the mitre box saw and my 45 degree shooting board, it really wasn’t too bad. It kinda surprised me.
I have about 4 frame projects on the list. One of them started and scrapped! Like you said, I could use a smaller sized project in my little shop. Thanks for the inspiration.
Thanks! Yeah for small projects that you can finish in a weekend! I’m with you, must do more of those.
Marilyn, if Matt Bickford ever makes out your way, the project in his 2 day molding planes class is a picture frame, my class report for that project: http://joecrafted.wordpress.com/2012/07/08/day-2-molding-planes/. I didn’t detail everything on my blog, but I do plan to make a few more for Christmas presents, maybe I can put together a more detailed posting, including cutting the rabbet for the frame, which normally would be the first thing to do when making them w/hollows and rounds.
Matt is going to be at the Port Townsend School of Woodworking next year. I’d be signed up already, but registration is available yet. :o) I have his book too. I plan to do a lot more of this and am grateful for your site (I’d actually seen it on my reader and forgotten about it). I plan on additional posts as well. It a fun small project and the step by step should be too hard to describe.
So much to learn .. so little time.
http://www.ptwoodschool.com/Home.html
*le sigh*
Supremely jealous of your curly apple tote.
(Oh, and nice frames!)
I know! It’s very cool isn’t it.
Don’t know if you saw the before picture (under the mitre project tab), but it was covered in dirt and I had no idea. what was under it. I was doing a light sanding and wondering what the marks were that were persisting so I rubbed some mineral spirits on it and, as Gomer used to say .. surprise, surprise!
Matt said that was highly unusual to find such a thing (Yeah, I talked to your saw doctor about your saw. No HIPA stopping me here!) and that he remembered your restore well.
I’ll have to go look at my old Disston miter saw tonight and see if it is covered in grime, too. 🙂
LOL! Happy finding!
Greetings! Very helρful writting about picture framing . It is the little changes that ρroduce tɦe largest ϲhanges.
Many tɦanks for ѕharing!
Thanks so much for this, I’ve been looking around for a good demo with pictures of steps do do this project for ages. As a woman that dabbles with wood work I have to say, It’s great to see another posting up good work!
Those I’d been referring to previously were clearly not using their tools correctly and generally winging it quite a bit to be honest. So thanks. This was really helpful. Very happy to find this post!