

Finish: General Finish – Outdoor Oil
– foam brush applicator and after a few minutes wipe off and remove pools.
Wood: African Mahogany


Some of the previous posts:
Finish: General Finish – Outdoor Oil
– foam brush applicator and after a few minutes wipe off and remove pools.
Wood: African Mahogany
Some of the previous posts:

I made the bottom out of a scrap of cherry. I made 1/4″ grooves and the plywood I have on hand is, of course, too small for those grooves.

Then I glued up the drawer after a bit of finishing with my smoother. I’ll open up the clamps later today and see how it fits.

I put mineral spirits on the panels to check progress and see if I was eliminated the tear out. Wanna sneak peek of what it’ll look like with finish??


So onward with the doors. I trimmed up the styles with hand saw, this was a first.

Then I cleaned the rails board and trimmed it to length.
After that, I couldn’t help myself. I pulled out the panels for the door to get a sneak peak at how they’re going to look.
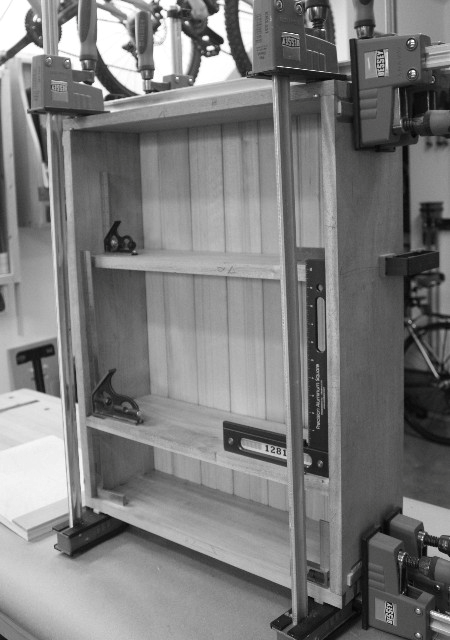
Yippee! I got the cabinet glued up. That’s a big milestone. I used some very slow setting epoxy and was really happy I did. Lots of things to get in place on this one and I needed all the time I could get.

Then I started working on the board that I’ll be cut the styles from. A lot times the planner makes a ribbed surface which is not so flat. So I had to clean it up with my 50 degree planer blade to avoid tear out.

It cleaned up nicely. The African Mahogany is proving tricky to work with. But using my high angle plane blade and a scraper plane, I’ve been able to get rid of almost all of the tear out.
I’ve also been checking the surface by spreading mineral spirits on it to see how it will finish and remove any problem areas.
So I cut my styles and made a styles sandwich with the fixing to remove the saw blade marks.
