Handsaw Essentials – Last Weekend

Last weekend, I journeyed over to Port Townsend to take Handsaw Essentials.  This was a great opportunity for me to get my new mitre box saw sharpened since one of the options for the class was to sharpen/restore a saw.
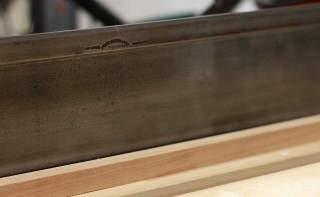
The tooth line on the blade is about 27″ long.  Thaaaat should give me some practice.  So I started out by putting my saw in Jim’s cool but easy to make saw vise written about in his “The New Traditional Woodworker” book.  This vise was plenty long enough to handle my blade entirely.

Then I jointed the tooth line with a file and started reshaping teeth by filing perpendicular to the blade.

Once the teeth were established I started to put in a 9 degree rake to the teeth using a saw file guide.

After that I put a slight set on the teeth (.2) since this saw will have a lot of teeth in the wood at the same time.

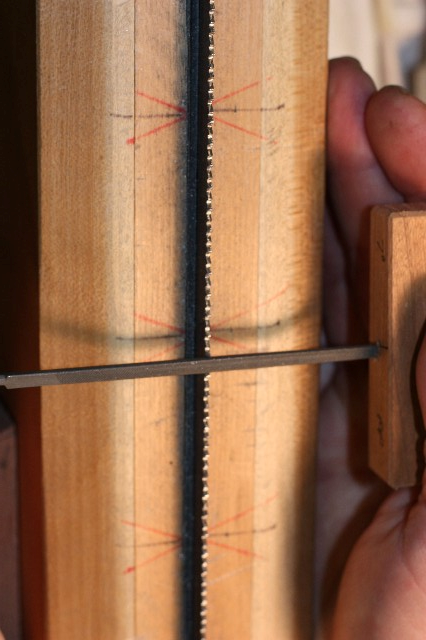
Lastly, I added fleam at a 20 degree angle (see the red lines on Jim’s saw vise) with a slight upward motion to allow all the saw dust from all those teeth in the wood to escape (this is probably some what unique to a mitre box saw).

Jim had a couple of suggestions if you wanted to retooth and demonstrated using a sawzall blade to use if you wanted to make the same number of teeth (7 points per inch for example).  Saw files are available at amazon.com.

Good saw sharpening links:

Saw Filing Guide

While my work bench lumber is being held hostage by snow ..

.. I might as well work on the mitre box saw.  I left my lumber on the storage rack at school so no more working on the work bench base until I go back to class.So I started working on the saw for my mitre box.  I used Matt’s recipe at the Saw Blogfor cleaning the saw plate.

Before:
So I pulled off the handle and got out the Simple Green and wet/dry 400 grit sand paper.  Rubbing in from tip to stern, I worked off the grim and rust.

After a good rinsing and drying (hopefully no one will notice that the blow drier made a trip to the shop), I set the saw plate to bask in the radiant heat.

Once thoroughly dried , I applied some paste wax for protection.  If you look closely you can see the saw bench and sheet rock reflected in the plate.

 
 And look what I uncovered after removing all the grim.  Now to sharpening.

Questions for my metal working / tool repair buddies

I bought this saw on Ebay because I think I can make cross cuts by hand instead of on the table saw. And .. I want to be able to miter accurately as well.  I chose this one because .. well .. it looked well used and cared for AND because I want to use it.  Collecting doesn’t do much for me.
So what and how much to clean and repair?
First, there’s a small crack in the frame and the back foot is broken off.  Some one recommended JB weld to fix these item (since I can’t weld nor do I have the equipment).  I do, however, have a friend who welds although he’s new to it.
Here are my questions:
  • What’s the best way to repair the crack?  I was thinking “spot weld” on the back side of the frame.
  • Should I have the foot rebuilt and if so, any suggestions on how to do that?
  • Cleaning.  There doesn’t appear to be a lot of rust just a layer of greasy black “something”.  Maybe its original paint or added later paint.  Should I clean it or just leave it.

  • Thoughts on assessing and lubrication the saw holding mechanism.  It works fine as is, but I want to make sure it stays that way.

Chocolate walnut and maple inside with a cherry outside ..

So the tool cabinet is finally finished.  Outside dimensions:  35″ high by 29″ wide by 15″ deep.Glamor shots:

Outside

Doors have book matched white oak panels with cherry frame.  I picked the panels up from Bell Forest.  Handles are oil rubbed bronze.

Yes, I have gotten a few comments that this is too nice for a tool cabinet, but hey, at least now I know I can do the cabinets for the inside of the house.

The panels were run through a power planer because I was having trouble with the knots and the significant cup.  Since then I’ve learned a few lessons from Joe and how to plane knots.  I’ll try that next time.

Inside with Tools
Cubbies were sized for specific tools.  Shelves are cherry with walnut dividers.  The back panels are left over from another project tongue and groove fir boards that I purchased from a local lumber yard.
This is my entire arsenal of planes and I have a little room to expand but I’m hoping I’m done with major hand plane acquisitions. (9 planes, right?) Some of these will hang on the interior of the doors.

Cabinet Side and Door Grain Matching.  I glued up the panels for the sides including the door width and then ripped out the door sides to make sure I had an appealing grain pattern.

Dove tail drawers – Maple and Walnut  with a small bead on the top and bottom.  These will hold my chisels and drill bits which I store in rolls. This allows me to pick up the whole roll at once and take it to the bench.

I still need to hang many of my tools.  The brace, egg beater drill, spoke shave, etc.  will be mounted later on the inside of the doors.

The Finish – I tried something new for this cabinet and really loved it.  The pores on the doors needed to be filled (white oak) to get a smooth exterior finish.  This wood filler worked wonders and dried clear.  Then I added the wipe on, wipe off satin finish.. in my garage.  No nibs and I couldn’t be happier with the results.I got the idea to use a transparent filler from Rob Bois’ butternut cabinet project.
From the Doh! Files
(a little reminders that I’m still learning not to make stupid mistakes)

1. Measure before you cut .. Doh!

2. Don’t drop your work on the concrete floor because even with a little water and a hot iron, you might not be able to decompress the fibers … Doh!

3. Pair up you tail board to make sure you don’t cut your tail board upside down .. Doh!

The Parting Shot

Links to other posts for this project: Tool Cabinet Project Page