This is how I laid out the dovetails and the mitered shouldered dovetail for the bottom edge.

First I marked out the area that needs to be dovetailed and measured that with my dividers.

I wanted four tails, so I laid out the sector to fit the dividers at 8 ..

.. and then set the second set of dividers to 2 to be able to produce 4 tails.

Then I walked out the 4 tails adding a tiny bit to allow for pin spacing.

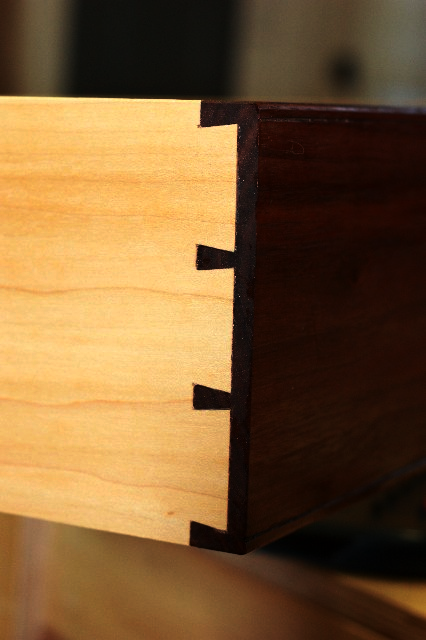
Ta da! 4 tails and pins.

This is how I cut the mitered dovetail to cover the slot that will hold the bottom of the cabinet.

And behold the mitered dovetail.
PS. Wanna know where to get a sector? Go here ->
CABINETMAKER’S SECTOR
Wanna know how to use a sector?? Or make a cheap one? Go here -> http://www.burn-heart.com/sector

")